How to Make Clothes on Roblox (Step-by-step)
Do you know how to make clothes on Roblox because the clothes on the game are starting to get boring, and you want to shuffle things a bit.
You are in right place, because we are going to tell you all the step of how to make clothes on Roblox custom designed.
By following the steps mentioned in this article will surely help you make cool-looking outfits for your Roblox avatar. It will also help you stand apart from other players, as the clothes matches your design sense and make you look unique.
So, without further delays grab your notebooks, because we will tell you all about how to make clothes on Roblox in great details!
Table of Contents
Platforms for Creating Roblox Clothing
If you’ve been a long-term fan of Roblox, then you’re probably aware that the game is available on several platforms.
Roblox was first introduced as a Windows-only game. As the time passed, and the game became popular; the game released a mobile version in 2012 on iOS Apple Store after six years.
The popularity just kept on increasing, and a couple of years later, the developers decided to launch an Android version of the game. A year after the Android version’s release, the game entered the Xbox One.
Now, if you’ve played this addictive game on any of these platforms, then you probably want to know how to make clothes on Roblox.
We do recommend you design your own personal outfits, and not just that, you can also upload your clothing designs through Windows PC or Mac.
You can design your outfits on mobile as well. But we recommend you play the game on PC because it provides a better experience. It would be easier for you to do the editing on a desktop.
But if only a mobile or a tablet is available, then we will also cover that issue in this article.
What You Need to Get Started
So, to know how to make clothes on Roblox. Before designing an outfit for your avatar, you’ll need a few things prepared. Here’s the list of things you might need to design an outfit.
- Image Editing Software
- Clothing Templates
- Roblox Studio
- Money
Now, we know what the requirements are to make a custom outfit. Let’s take a deep look into these mentioned things, Shall we?
Image Editing Software
The main and most important part of creating a custom outfit in Roblox is a good image editing software. There are numerous platforms available on the internet.
There’s a high chance that image editing software is already available on your device. But if you don’t have one, then don’t worry; you can buy paid software or use the free one.
The only requirement is that the editing program you install must support ‘transparent layers.’ We will recommend you use Adobe Photoshop.
If you can’t buy a paid program, then you can try Paint.net or Photopea. These are free software which would work just fine for this purpose.
So, downloading a photo editing program is a must if you want to know how to make clothes on Roblox.
Clothing Templates

Next, you’ll need clothing templates, and Roblox itself provides these. Because Roblox doesn’t support other templates, you’re bound to use Roblox’s templates when creating custom ‘Shirts’ & ‘Pants’ for your avatar.
- To download these templates, click on this Link: https://developer.roblox.com/en-us/articles/How-to-Make-Shirts-and-Pants-for-Roblox-Characters
- On the right side of the page, you’ll see the options of ‘T-shirts’ and ‘Shirts and Pants.’
- Click on the option and download your templates by right-clicking on the image available on the page and selecting “Save image as.”
- Save the image in your files, and don’t forget its location because you’ll need it when designing clothes.
You’ve now obtained the supporting template. You are pretty close to get complete knowledge of how to make clothes on Roblox.
Roblox Studio
This one is not necessary, and you can move on without downloading Roblox Studio. But if this is your first time, and you are still learning how to make clothes on Roblox.
Then you might want to get a preview of your character’s appearance with the custom outfit you just designed before uploading it.
You’ve to pay some money to upload your shirts and pants designs on Roblox Studio. So, it would be better for you to get a preview before uploading, or else you might regret it if there is an issue with your design, and your money will go to waste.
Use this Link and download Roblox studio. Once the Roblox Studio is installed, install Clothing Previewer. Just one more thing, and then we can move on to our topic, ‘how to make clothes on Roblox.’
Money
Uploading your custom-made outfit designs on the official Roblox game will cost you money. Even though designing the shirts and pants for your avatar is free, uploading costs money.
You can get a premium subscription to Roblox and pay a monthly subscription fee starting from $4.99, $9.99, and $19.99.
These three tiers of subscriptions give you the same benefits. Each month you receive 450, 1,000, and 2,200 Robux, depending on your subscription package.
We have finally gathered all the things required; now, let’s start discussing how to make clothes on Roblox, explained step-by-step for your ease.
How to Make Clothes on Roblox (Step-by-step)
So, without wasting more time, we will present you with a step-by-step guide on how to make clothes on Roblox.
The Roblox has three types of clothing for your avatar: a t-shirt, a standard shirt, and pants. First let’s start with the easiest one, ‘T-shirt.’
How to Create a T-shirt for Roblox
Follow the instructions to create your custom T-shirt on Roblox:
- Step 1: The T-shirt is a solid color and has an image on the front. So, get an image from Google but make sure that the image is copyright-free. If you want to make an image of your own, then use an image manipulation program. (Make sure the image you’re using is square and has 512 x 512 dimensions).
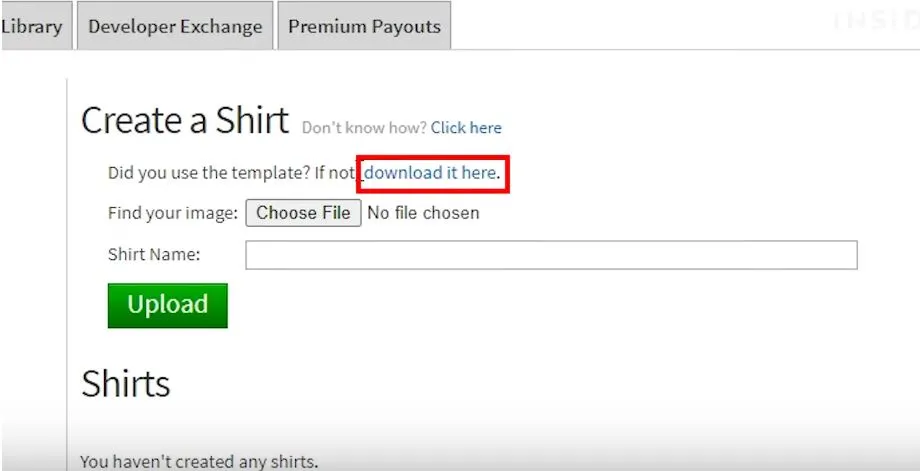
- Step 2: Now that you have the image, save it in your files and go to roblox.com. Press the “Create” link present at the top of the page.
- Step 3: Find the “Manage my experiences” option and click on it.
- Step 4: If you didn’t select the “My Creations” tab, select it.
- Step 5: From the left side of the page, select “T-Shirts”.
- Step 6: Click “Choose File”, find your saved image from the files and select it.
- Step 7: Upload the image. Your t-shirt will appear on the avatar editor page after uploading.
If you follow the steps, you can make a T-shirt for your avatar on Roblox. Now you know how to make clothes on Roblox.
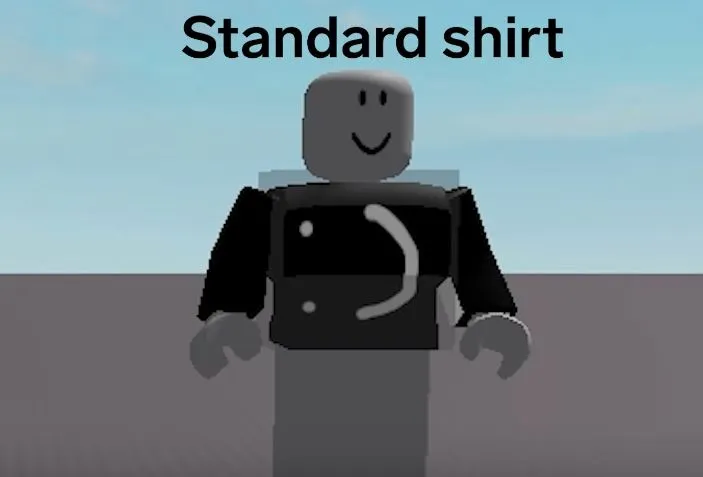
How to Create a Standard Shirt
We didn’t use the template we downloaded earlier to make our T-shirts. But now we will need it, so download the templates using the link above if you haven’t.
Now, follow these steps on how to make clothes on Roblox. This time we will make a standard shirt.
- Step 1: Launch your editing program (Paint.net) and open the downloaded template file. Select the shirt file, not the pants file.
- Step 2: Now, click on “Layers” and select “Add New Layer” a new layer will be added on top of the “Background” layer. The background layer is the template layer. The template’s primary purpose is to guide you.
- Step 3: From the bottom left-corner select colors from the “Colors” palette.
- Step 4: Now, select the rectangular selection tool from the “Tools” palette.
We’ll be making the entire shirt of the same color to keep it simple and easy. So with the selected tool, click and drag the cursor to create a rectangle that covers the shirt template area.
- Step 5: Now, press the “Backspace” key to fill the selected area with the color you choose from the color palette.
- Step 6: Add the image you downloaded for the shirt’s front. To do that, click on the “Layers” menu and select “Import From File…” select the downloaded image and click on “Open.”
- Step 7: Before placing the image, deselect the colour layer temporarily.
- Step 8: Hold down the “Shift” key and resize the imported image to place it on the front of the shirt.
- Step 9: After placing the image in the box that says“Front”, select the colour layer again that you specified earlier.
- Step 10: Finally, select the topmost layer and click on “Merge Layer Down”.
- Step 11: Click on the “File” and then “Save As…”.
- Step 12: Change the “Save as type:” to “PNG.”
- Step 13: Click the “Save” button and press “OK”.
Your PNG file is ready to be uploaded on Roblox. This way, you know how to make clothes on Roblox and make a standard shirt for your avatar.
How to Create Pants
We’ve learned a lot about how to make clothes on Roblox in this article. But now, the only thing left to do is to make pants for your avatar. For pants, the method is exactly the same as making a standard shirt.
The only difference is that you’ve to use the pants template instead of the shirt template. So, use the exact same method as before and give your character pants to cover himself.
Testing, Uploading, and Selling
Not that you know how to make clothes on Roblox, you need to test them before uploading for selling. Once you’ve created your design, you should get a preview of that design in Roblox Studio. To do that, follow the steps.
- Step 1: Log into your Roblox Studio account. Go to the “My Games” tab and select a game there to test the outfit you just designed.
- Step 2: In your selected “Home” tab, in your “Toolbox”, scroll down under the “Models” till you find “R6 Roblox Dummy.”
- Step 3: Right-click on the dummy you just selected and press “Zoom to”, so you can seethe dummy from close.
- Step 4: click on the “Plugins” tab and select “Clothing Previewer”.
- Step 5: Now click on “Import Templates” and select the design you created.
- Step 6: Drag that template over the dummy. This way, you can get a preview of your design.
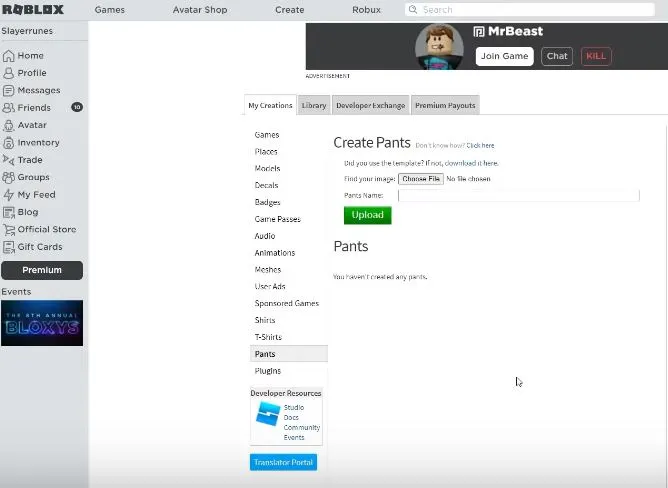
- Step 7: To upload the design go to “My Creations’ ‘ on the Roblox website. Select “Shirts” or “Pants.”
- Step 8: From the“Choose File” button, select your PNG file for upload
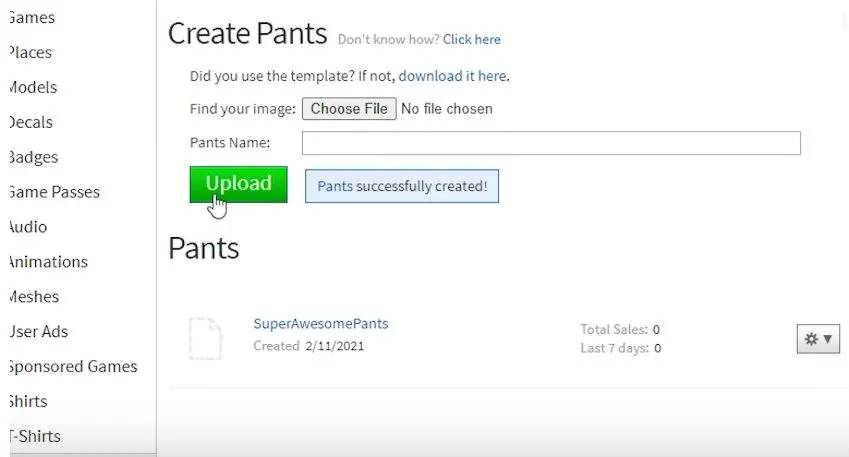
You will need 10-Robux for each upload of shirt and pants. So, you’ll need enough Robux before the upload.
Conclusion
You’ve successfully created a custom character design for your avatar. Now you know how to make clothes on Roblox because of this step-by-step guide. We hope our detailed explanation helped you create some fabulous outfits.
Enjoy! creating new cool outfits.
